A Beginner’s Guide to Yoast SEO

SEO is necessary for any website. And while WordPress’s code is optimized for the technical side of SEO, there’s a lot more you can to do to ensure you get ranked and get visitors to your website. That’s where WordPress SEO plugins come in, specifically, Yoast SEO.
In this guide, we’ll go over the plugin’s settings and features and how to use Yoast to optimize a blog post.
Yoast SEO is toted as the number one plugin for optimizing your WordPress on-page SEO. Once you’ve installed it, it’s easy to understand why: Yoast gives you incredible control over every aspect of your on-page SEO.
For example, Yoast’s meta box is a tool that’s displayed when you create or edit pages or posts, and it allows you to:
- Customize meta descriptions and how search engines display your posts
- Evaluate and optimize the readability of your content
- Optimize content to rank for a specific keyword
Of course, the meta box isn’t the only thing Yoast has going for it. But before jumping in, it helps to have a solid understanding of what, exactly, on-page SEO is.
On-page SEO and Content
You may have heard of the concept content marketing. If you have, and you haven’t yet implemented a strategy, you’ll want to seriously consider it. If you’ve already started creating content for your website and you’re wondering how to optimize it for search engines—congrats! You’re reading the right guide.
A good digital content strategy is built around providing consistent, quality content that provides value to your current and potential customers. Writing blog posts that entertain and inform your audience is paramount to establishing yourself or your company as an authority in your field. It’s what transforms you from online business to online expert.
But your content has to be appealing to more than just human readers. It has to be readable by search engines too. You accomplish this by optimizing your on-page SEO.
When Google visits and scans your website, it doesn’t understand your blog post the way a human reader does. Instead, to help determine how relevant it is, it looks at things like:
- Titles and image descriptions
- Keywords in your text
- Meta information about your page
- Your page’s URL structure
- And so on
Moreover, Google’s crawlers need a way to help understand what your website is about and a way to navigate it efficiently. To do this, you need to optimize your robots.txt file and have properly configured sitemaps, among other things.
So, in short, on-page SEO optimizations are the methods and techniques of making your website and content accessible and readable by both people and search engines. For WordPress, Yoast SEO gives you fantastic tools to accomplish these things.
Setting Up Yoast SEO
Now that you know what Yoast is and what it does, let’s get started. Installing Yoast is as simple as searching for it in WordPress’s plugin repository and activating it. Once it’s installed, you’ll have a new SEO interface in your WordPress administration area.
Yoast has many options out of the box. Thankfully, the plugin gives you a nice configuration wizard that will walk you through the basics.
Configuration Wizard
Even if you’re already familiar with SEO, Yoast’s configuration wizard is a good way to go over all the important aspects of your WordPress SEO to make sure everything is as it should be.
If you aren’t completely sure on what to select, don’t fret—you can change these settings later from within Yoast’s menus. You can also rerun the wizard at any time.
Page 1: Environment
The first page determines whether your website is live or a development site. Most likely, you’re working with a live site, so you’ll want to choose option A. Only choose option B if you don’t want your website to be indexed by search engines.

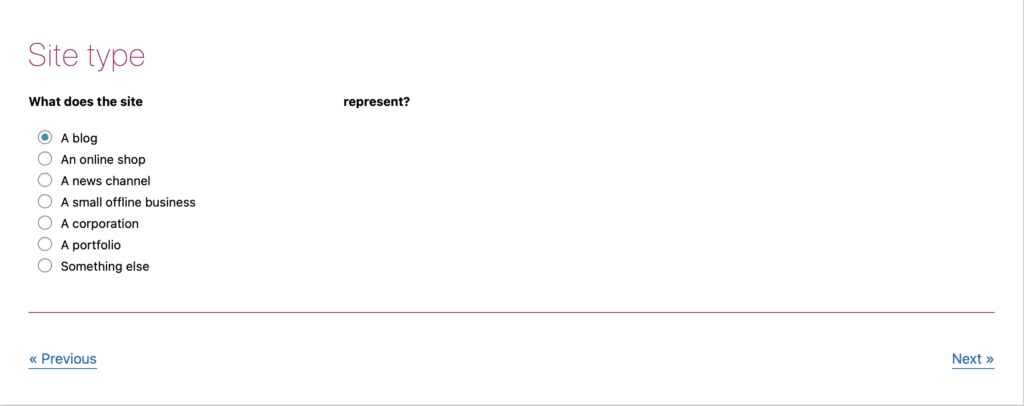
Page 2: Site Type
This setting is more for Yoast’s purposes and doesn’t have any direct effect on SEO, but it’s important to know what, exactly, your website is about for configuring other settings. Simply choose the most appropriate option for your website.
Page 3: Company or Person
Next, you’ll choose whether your website represents an organization or a person.
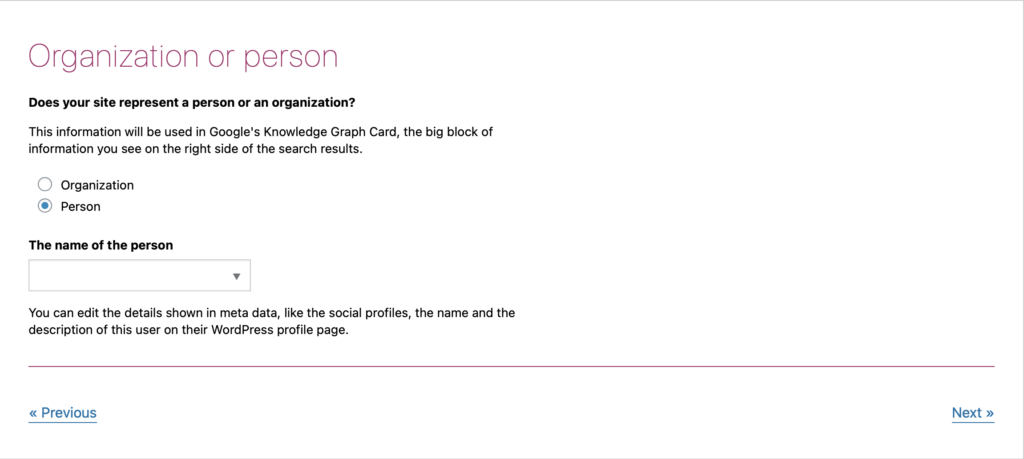
If you select an organization, you’ll be asked to enter the organization’s name, logo, and social profiles. It’s best to fill these out as much as possible as Yoast uses this information to help build a Knowledge Graph for Google.
Google’s Knowledge Graph is the extra information that appears along the right-hand side of the page when Googling a common term. For example, searching for Coca-Cola will provide you with a lot of extra information on the brand:

You don’t need to fill out every last detail here, but Knowledge Graph cards are pretty prominent, so every little detail helps.
Page 4. Search Engine Visibility
This section determines the page types on your website you want search engines to make visible. These settings fall into more advanced optimizations, so you’ll want to leave them set to the defaults.

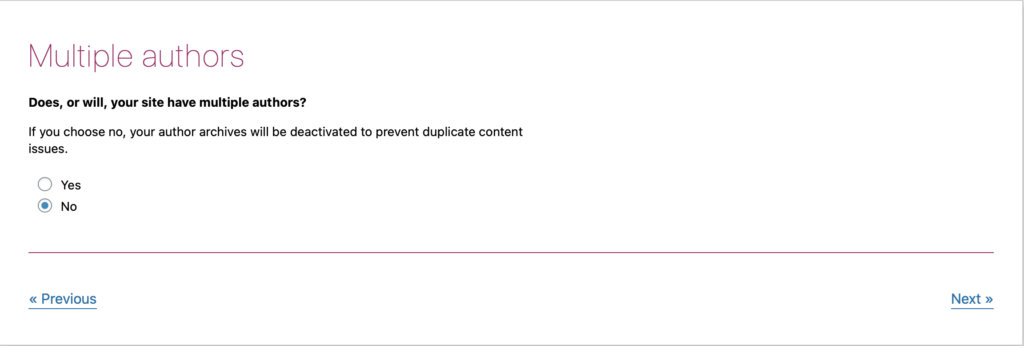
Page 5: Multiple Authors
If you’re the only author on your website, Yoast will automatically configure your post archives to not be indexed by search engines as this can cause SEO issues when you have duplicate content.
If, on the other hand, you do or plan on having multiple authors, you’ll want to enable this feature so that users can still find a specific author’s post in search results.
Page 6: Title Settings
The title is what appears in Google’s search results when a user finds a particular post on your WordPress website. What settings you choose isn’t as important as the fact that Yoast makes these settings consistent across all of your posts—consistency is an important factor in SEO.
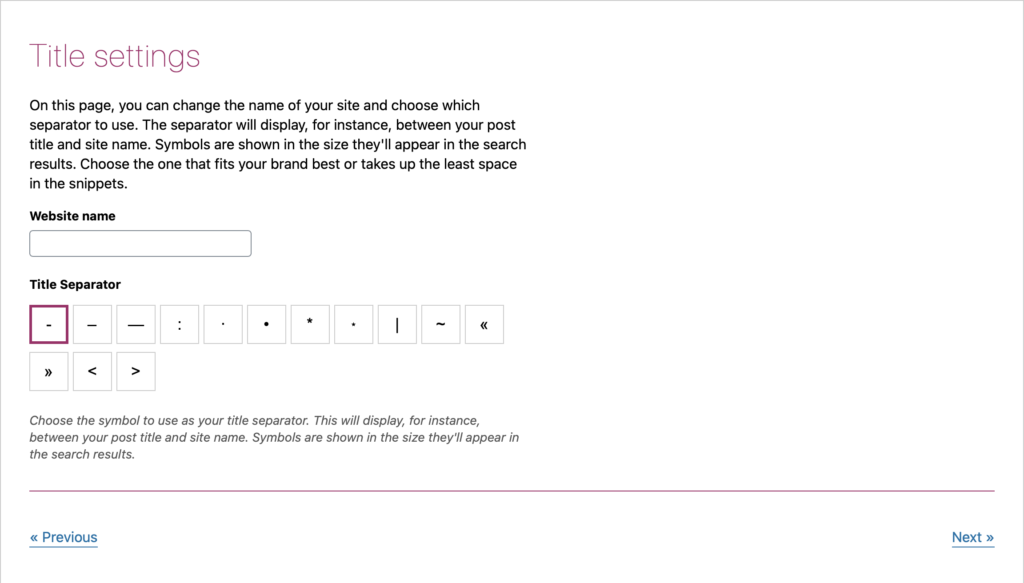
The website name is, as you’d expect, the name of your website. The separator is what sits in between your website name and the title of your page or blog post.
7. Final steps
The last few pages of the configuration wizard are dedicated to Yoast’s marketing efforts, including prompts to share your website’s information and sign up for Yoast premium. Yoast does offer many features for free, so we recommend you get comfortable with the plugin first before determining whether you need the premium features.
Beyond that, you’ve now completed basic SEO optimization of your website. From here, we can start diving into the other features of the plugin.
A Tour of Yoast’s Interface and Settings
The configuration wizard does a fine job taking care of the basics, but Yoast is an extensive plugin with a plethora of features. In this section, we’ll take a look at the rest of Yoast’s settings and interface.
If you’re already comfortable with SEO, or you’re more of a hands-on learner, feel free to jump ahead to see how to use Yoast to optimize a blog post for your WordPress website.
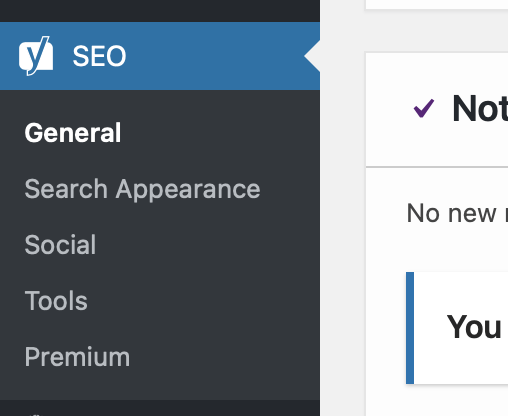
General
When you click on SEO in the WordPress menu, you’re greeted by the Yoast dashboard. Here, you have a few different sections, such as the problems panel.

Yoast is always running and analyzing your WordPress website for potential snags in your SEO optimization. It’s a good idea to check the dashboard occasionally to see if there are any issues and see what you need to do to resolve them.
Your dashboard is also home to Yoast’s notifications, which inform you of feature updates and additions in the application, as well as a way to re-run the configuration wizard.
Features
The features tab offers a way to enable or disable some of Yoast’s advanced settings. Most of these should be enabled by default—they’re what makes Yoast useful.
Integrations
The integrations tab is where you can enable third-party integrations with tools such as SEMrush. If you’re not using these tools, it’s safe to leave them as is.
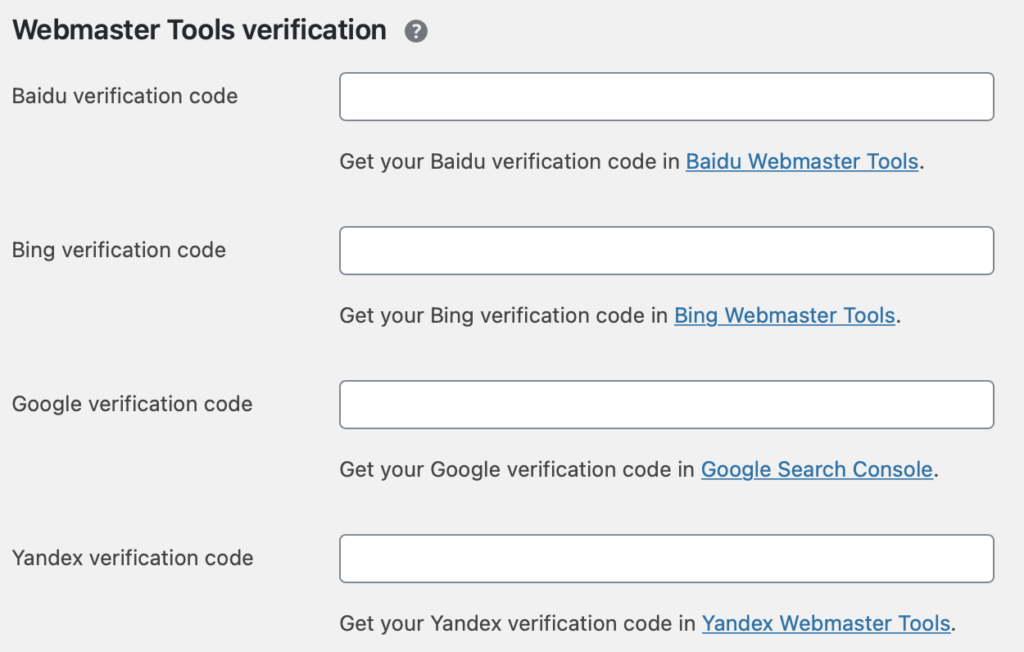
Webmaster Tools
Yoast offers a central place to verify your WordPress website with SEO and keyword research tools, which is quite handy if you’re really getting into the specifics of SEO optimization.
Search Appearance
The search appearance area is where you can further configure how your posts and pages are displayed in search results. Here, you can adjust templates for the titles and descriptions of your:
- Pages
- Posts
- Taxonomies
- Archives
This is also where you can change and modify the organization settings you set up in the configuration wizard.
Another great feature of Yoast is the ability to enable and configure breadcrumbs. Breadcrumbs are a great way to give users the ability to quickly navigate around your website, improving the user experience.

Social
In the Social menu, you can add various social networks to your WordPress website, while, for more in-depth SEO, you can interact with more advanced APIs, such as Facebook and Twitter’s Open Graph.
Tools
Lastly, the tools section gives you access to a few different editors that come in handy. You can also import and export Yoast’s SEO settings from this menu.
One feature worth mentioning is the file editor, which gives you the ability to edit your robots.txt and .htaccess files directly from within WordPress.
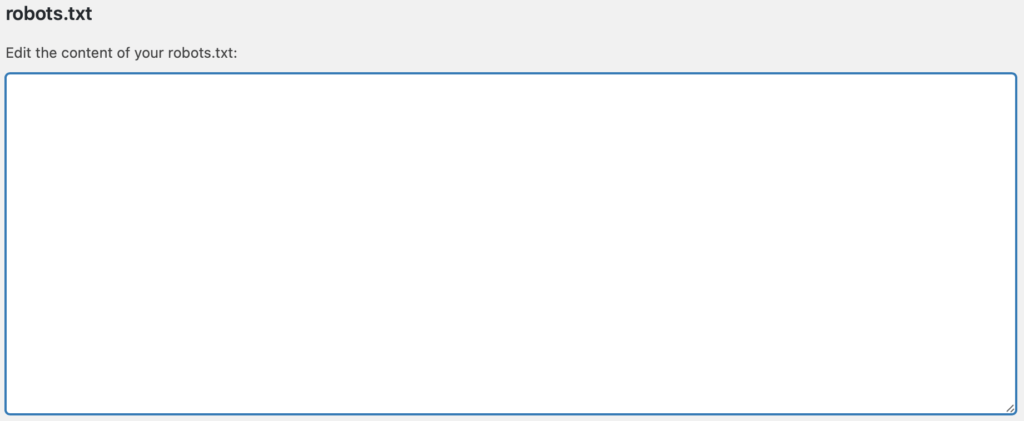
While modifying and optimizing these files are beyond the scope of this article, they are an integral part of on-page SEO, so knowing how to work with them and having an easy means to do so is a huge plus.
Using Yoast to Optimize a Blog Post
Now that we’ve installed Yoast, ran the configuration wizard, and gone over many of Yoast’s features, it’s time to do what we came here to do: Optimize a blog post for SEO!
Before jumping in, it’s important to understand that SEO is more than just a single plugin. Good SEO requires a content strategy and lots of research, specifically research into the types of keywords or keyphrases your content will be targeting.
Optimizing a blog post with Yoast is relatively easy, once you know the ins and outs of SEO optimization. The plugin provides a handy meta box that runs alongside WordPress’s post editor.
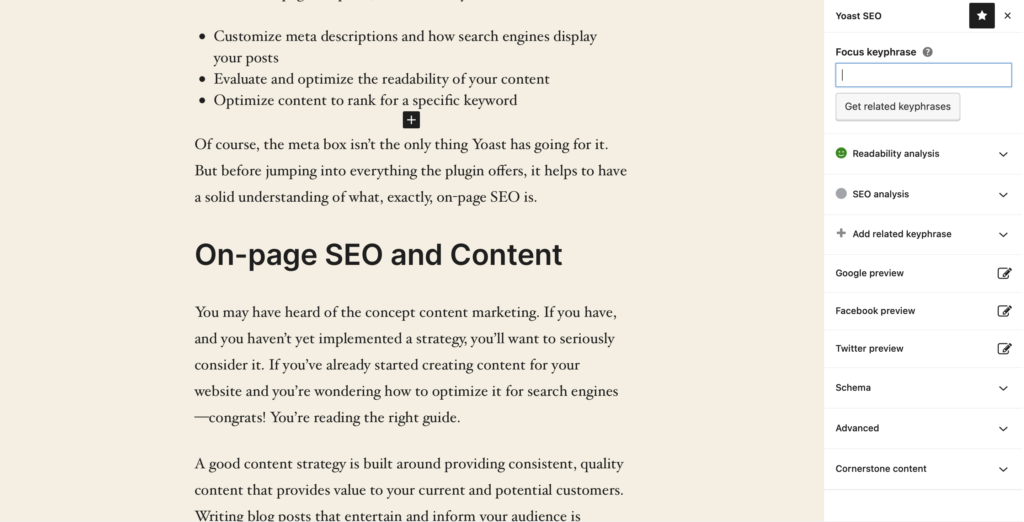
Focus Keyphrase
The first thing you’ll see at the top is the focus keyphrase field. This is where you’ll enter the keyphrase that you want your blog post to target. Yoast will use this to evaluate whether your article has utilized the phrase properly throughout.
For this post, we’re using the focus keyphrase of “how to use Yoast to optimize a blog post.”
Readability Analysis
Next up is readability analysis. This area grades the quality and readability of your article. This section is good for determining how accessible your article will be to the average internet reader. It offers guidelines to follow that help keep your content succinct and flow well.

With that said, these are somewhat subjective, so it’s okay to bend the rules a little. As you can see, this article has a few longer-than-average paragraphs, and if you’re reading this, they didn’t deter you!
SEO Analysis
The SEO analysis section is where the real SEO magic happens. In this area, Yoast analyzes your content and gives you actionable suggestions to help maximize the on-page SEO for your blog post.
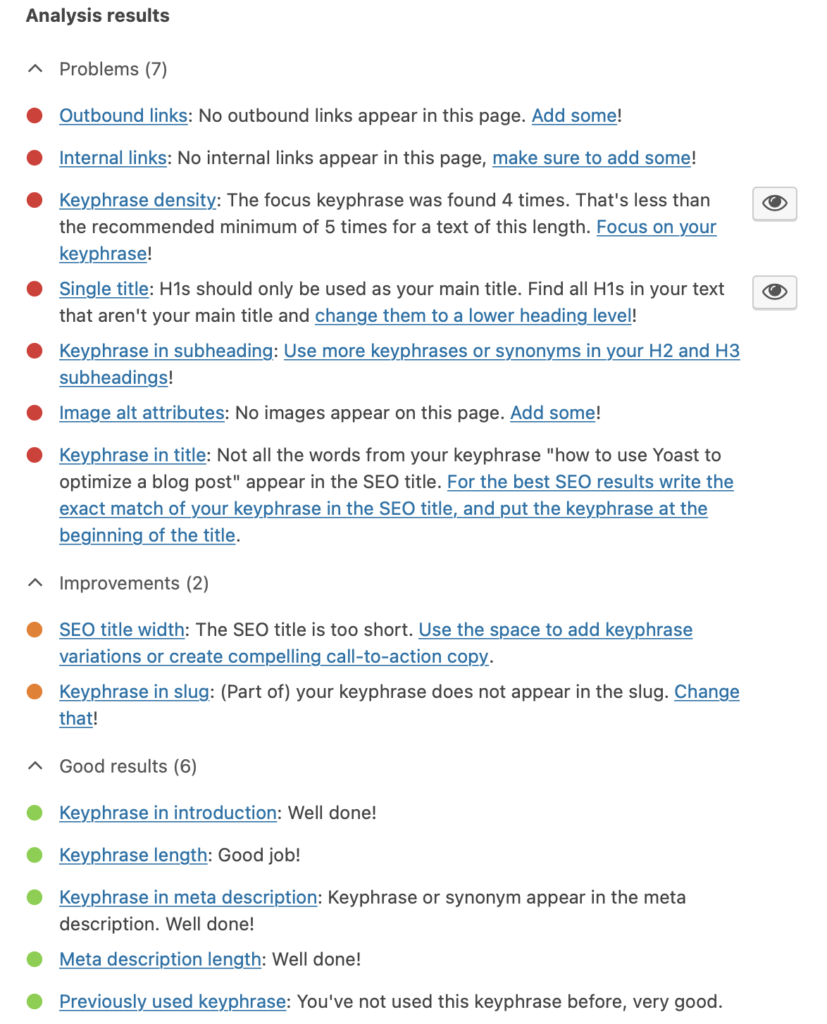
As you can see, we’ve got some serious work to do on this blog post before it’s considered well-optimized.
Meta Description
Scrolling to the bottom of your blog post, you’ll find much of the same information in the sidebar, but with more advanced settings.
Here, under the SEO tab, you can click on the Google Preview drop-down to enter a meta description. Your meta description should describe your blog post and provide readers with the goal of your article. For example, for this post, the meta description is:
“The definitive guide to using Yoast SEO for WordPress. All the ins and outs of how to use Yoast to optimize a blog post for SEO.”
Once you’ve decided on a good meta description and entered it, you’ll see a nifty preview of how your post will appear in Google’s search results. This allows you to fine-tune your description to give it the most bang for your buck.
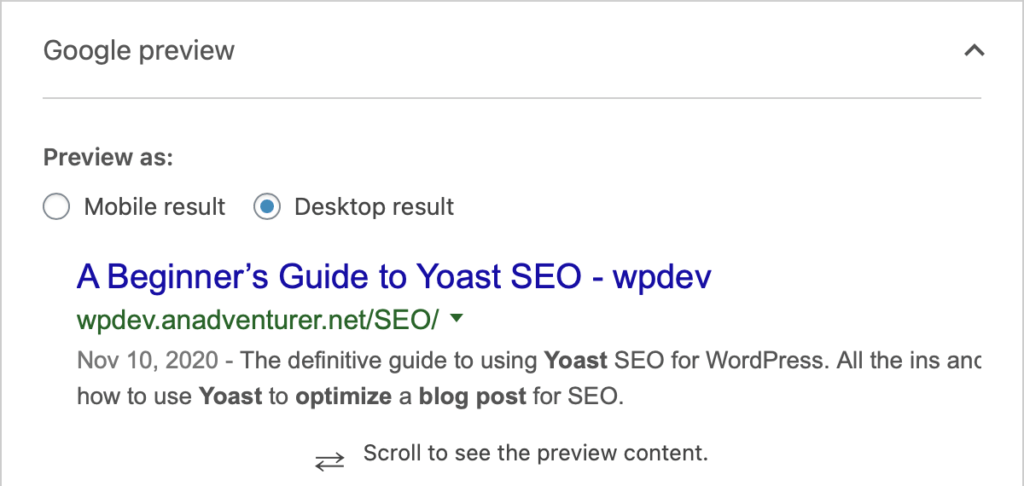
You’ll also notice that words in your focus keyphrase will appear bolded in your meta description. It’s good practice to include some or all of your focus keyphrase in your description.
Publishing
Once you’ve gone through all the necessary steps and followed all the suggestions that Yoast offers, you’re ready to publish a polished article that’s optimized for maximum SEO efficiency.
Final Words
As you can see, Yoast is a powerful and extensive SEO plugin for WordPress. Using it can help you polish your content so that it has the best chance of success in search engine rankings.
Of course, this is only one small part of SEO. There’s a lot more to learn—both in Yoast and with SEO in general. But even if you only follow this guide and perform the basics with Yoast, it will take your WordPress website a long way in ranking on Google.
Join Our Newsletter
Stay up to date on the latest WordPress tips and news