WooCommerce: A Guide for Beginners

If you run a WordPress site and you’re thinking of expanding into the world of e-commerce, you’ve probably already heard of the fantastic WooCommerce plugin. Maybe you’ve even done a little homework on it and you’ve read some good things.
WooCommerce was developed by WooThemes and has been around for several years now. In the time since its inception, it’s become the most popular WordPress e-commerce plugin in the world. WordPress aside, the plugin runs about a fifth of the top e-commerce websites out there. It’s so popular, in fact, that Automattic, the company behind WordPress, purchased WooThemes back in 2015.
In this beginner’s guide to WooCommerce, we’re going to take a look at the benefits of using WooCommerce and what makes it so great. From there, we’ll see how to install the plugin, configure your store, and get everything set up so that you can start selling products online.
The Benefits of WooCommerce
WooCommerce is built with the same principles as WordPress. In other words, it’s made to be powerful yet user-friendly. And while it maintains this principle in its core, it still manages to be extremely flexible.
With WooCommerce, you can adapt your existing WordPress website into an online store by simply adding a shopping cart. Or you can build an entire online boutique from scratch. And everything in between. Better still, WooCommerce scales wonderfully, so you can start with a few simple products and eventually expand your website into an online mega mall.
To be clear, WooCommerce isn’t only about physical products. It can easily be adapted to sell:
- Digital downloads
- Bookings
- Member subscriptions
- Bookings
- Customizable products
WooCommerce also has some great store management features right out of the box. You can easily set up order fulfillment and tracking and shipping label configuration—literally everything you need to create and maintain an online store can be managed within WooCommerce.
As robust as it is, the best part about WooCommerce is that it’s free. Like WordPress, WooCommerce is open-source software and free of charge, so if you have the time and patience, you can have an online store up and running for the cost of only your web hosting.
Now that we know what WooCommerce is about, let’s dive into the details and see just how easy it is to open the doors to your first e-commerce store.
Installing WooCommerce
Like other plugins, WooCommerce can be installed via the plugin section of your WordPress administration console. From the Plugins menu, go to the Add New page and type WooCommerce into the search bar. Click the install button and then activate.
Once it’s installed, you’ll be greeted with WooCommerce’s installation wizard. All the settings in the wizard can be configured later, but it’s worth running through the wizard to get a feel for what you’ll be doing. Let’s dive in.
1. Store Details
In the first page, you’ll fill out the physical address of your store. If you plan to have your shop entirely online, this can be your home address or another address you plan to use for your store’s return mailing address.

2. Industry
This one is pretty straightforward—the industry for the products you intend to sell. Select all that apply or, if none are applicable, go with other.

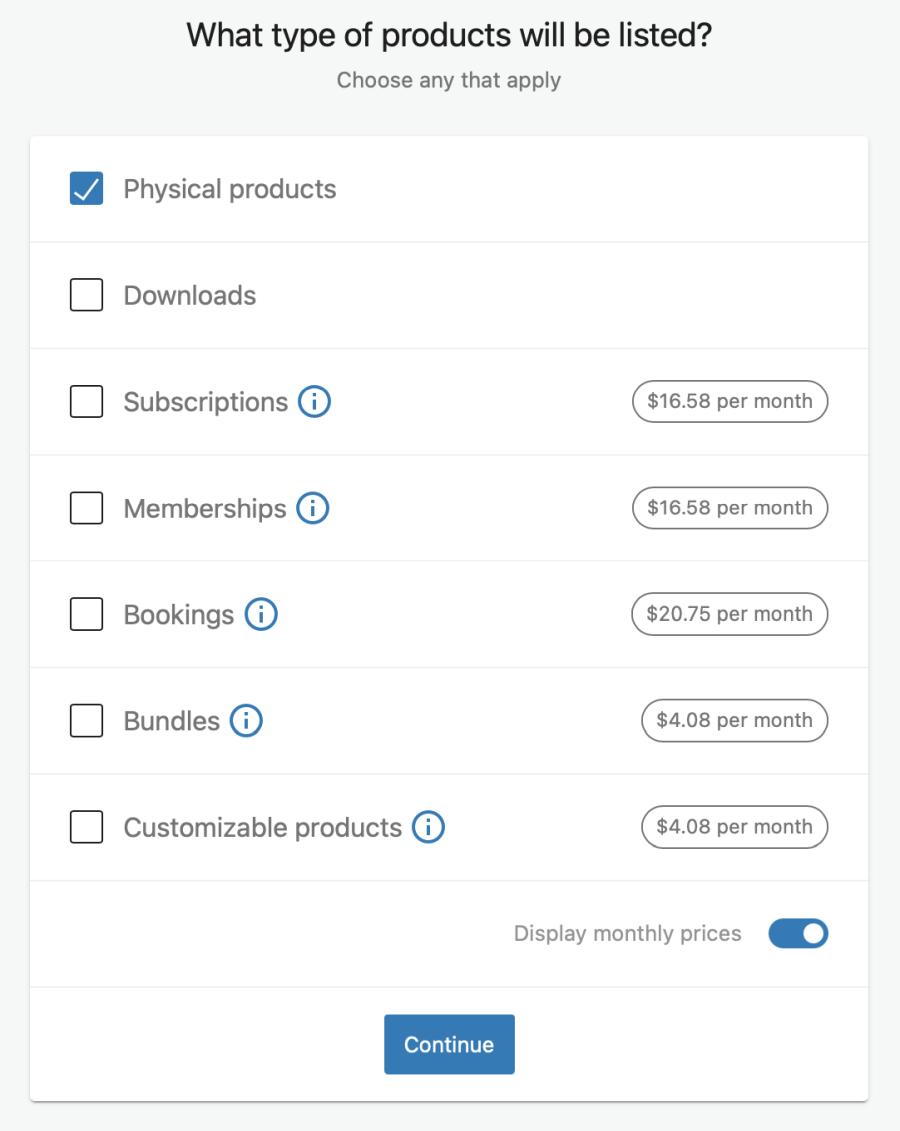
3. Product Types
This step gets a little more complicated if you’re intending on selling something other than physical products and downloads. While WooCommerce is open source and free, you need to pay a monthly fee to be able to use it to sell specialized products or services. Clicking on the icon to the right of each category will give you more information.
4. Business Details
Your basic business details—how many products you intend to sell and whether or not you’re currently selling them on another website or platform. You can also select to install some of WooCommerce’s free business features, which will automatically install some helpful plugins such as Google Ads for WooCommerce and Facebook for WooCommerce, among several others.

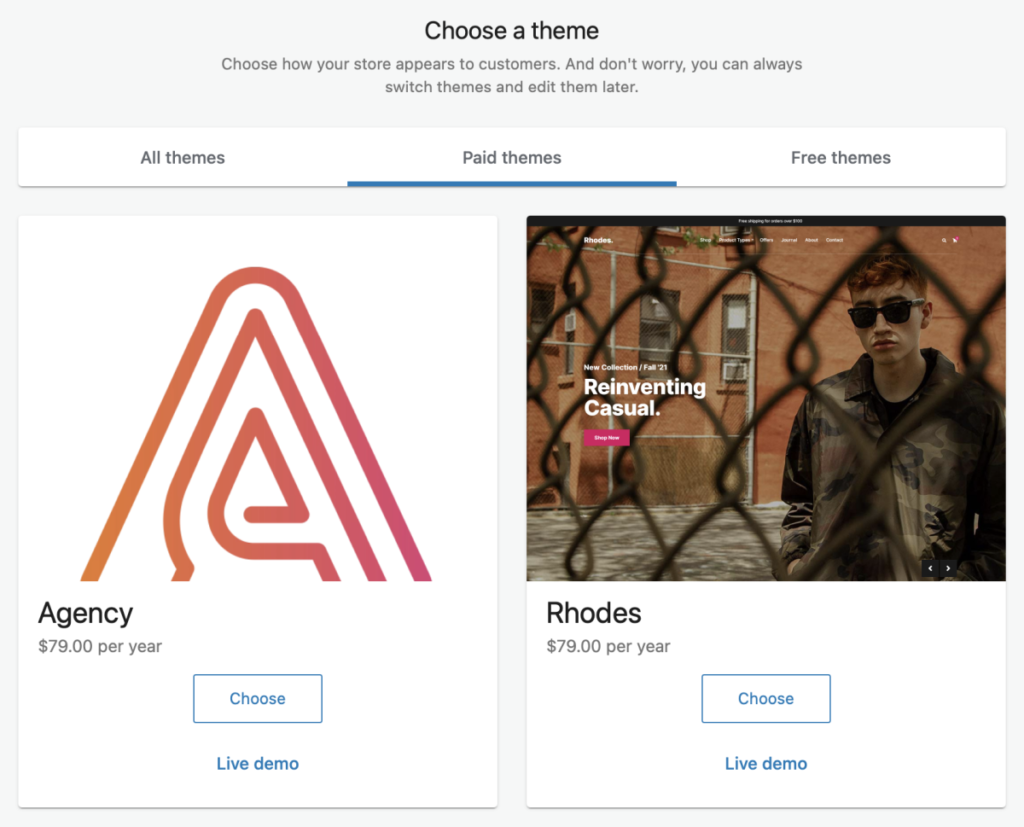
5. Theme
Finally, you’ll choose the theme you want to use for your online store. From here, you can select from one of the free basic themes or choose to go with a premium one. You can, of course, change this later, so don’t spend too much time here; we’d recommend simply picking one of the nicer-looking freebies for now.
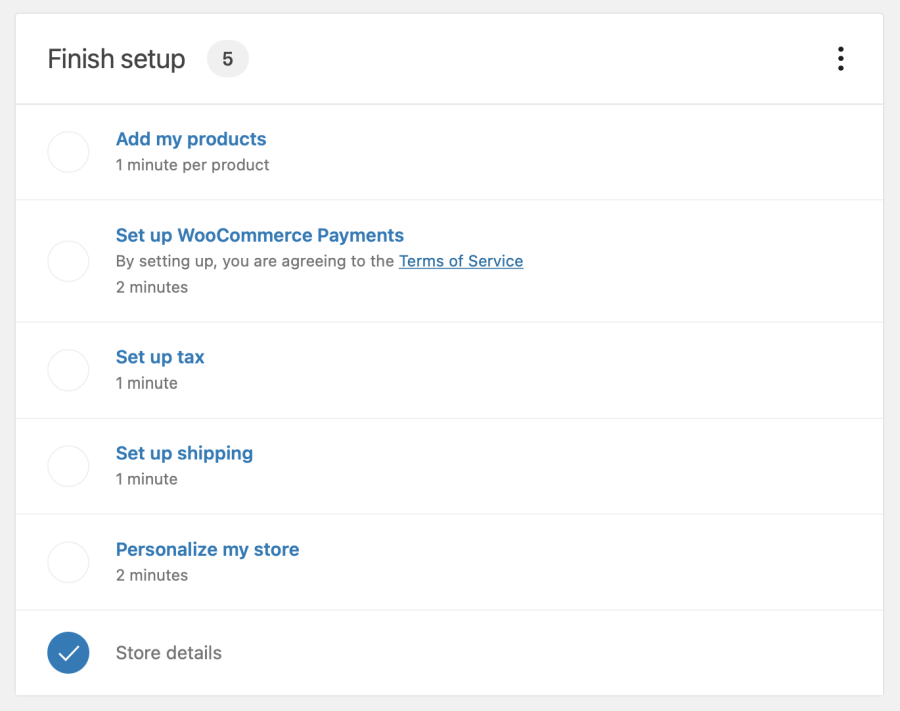
Setting Up Your Store
Now that you’ve completed the setup wizard, you’ll be taken to the main WooCommerce dashboard where you’ll be prompted to continue setting up your store. The first step is to start adding products to your new store.
Adding Products
Adding products is a relatively straight-forward process. If you’re coming from another e-commerce platform, you have the option to import products, but we’ll assume this is your first foray into e-commerce and add a new product from scratch.
If you’ve used WordPress before, the add product page will look familiar to you—it’s the same interface for adding a page to your website. You’ll also notice there’s a handy popup that explains the field you’re working on. Feel free to click Next to get more detail about each section.
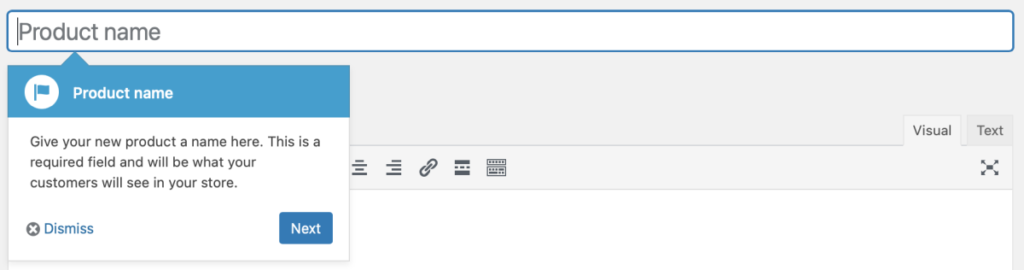
Product name, as you’d imagine, is the name of your product. It’s what your customers will see in your store.
Product description is the main body of text describing your product. This is the area you’ll want to go into detail about what you’re selling. How it’s made, what it’s made with, the ideas behind your product—any information that you think makes your product appealing can go here.
Product data is where you’ll configure the kind of product you’re selling, whether physical or digital, their pricing, shipping information, SKUs for managing inventory, and a lot more.
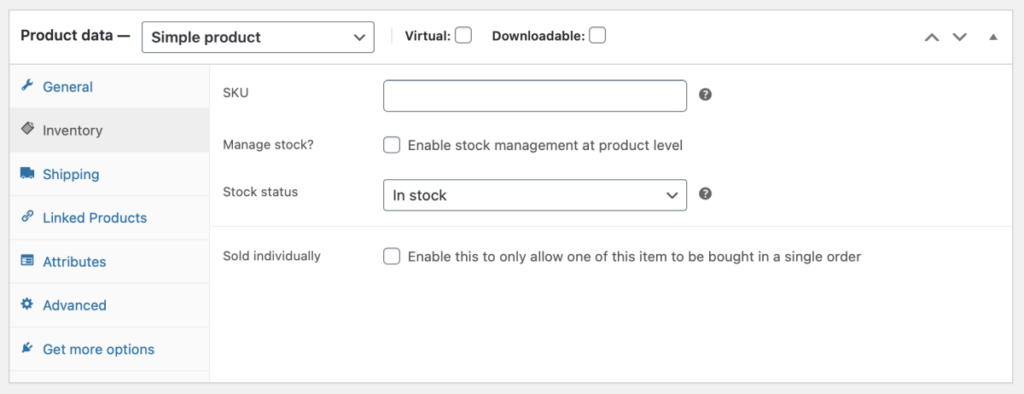
We won’t get into every setting here, as it could be its own guide unto itself. The important points here are:
- Product type
- Virtual or downloadable
- Price
Of the product types, simple product is the one you’ll most often use. As for virtual products—this tells WooCommerce that your product isn’t physical and doesn’t require shipping. Downloadable products are similar with the addition that access to a file is granted to the customer once the product has been purchased. And finally, you’ll need to set the pricing for your product.
Product short description is a more concise description of what your product is. This is the text that will appear under your product when your customers are browsing your store.
Product image is where you’ll upload the images for your product. Note that, right under the image setting, you can also upload gallery shots.
Product tags are where you can assign tags to your product. These tags help your customers find the types of products they’re looking for.
Product categories are a little more specific than tags; this is where you’ll determine the grouping of your products. For example, if you intend to have a clothes shop, and your product is a woman’s dress, the product might belong to a category of “Dresses,” which then belongs to a category of “Women’s Clothes.”
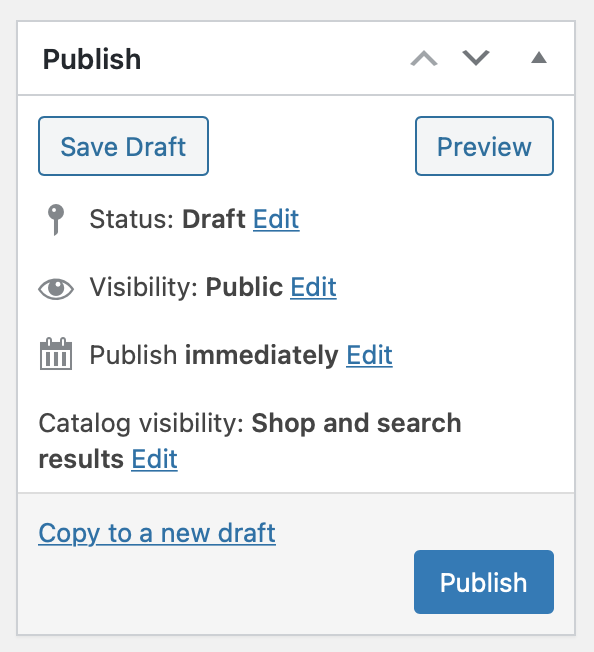
Once you’ve entered all of your product information, go ahead and publish it like you would a WordPress page or blog. Your very first product is now live!
Next up, it’s time to get paid.
Setting Up Payments
Once you’ve added your product, the next item on the to-do list is to set up WooCommerce payments. WooCommerce comes with multiple integrations for getting paid, including:
- WooCommerce Payments
- Stripe
- PayPal
- Cash on delivery
- Bank transfers
- And even offline payments
To get started, click on the option to setup WooCommerce payments. If you haven’t already done so, you’ll need to setup a WooCommerce account. You’ll fill out all of your personal information as well as either your bank information or a debit card for payments to be sent to.
Once you’ve setup your WooCommerce account, you’ll be prompted to connect it to your website. Once connected, you’ll be able to immediately begin processing payments through WooCommerce’s credit card transaction service.
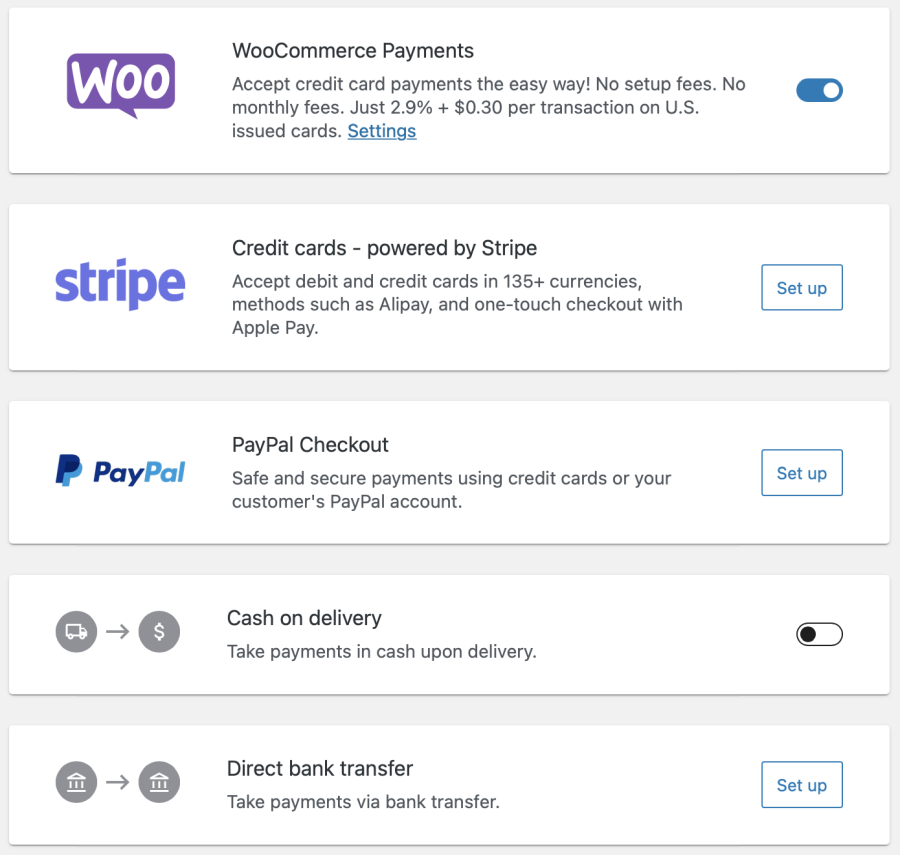
There’s no such thing as having too many payment options, so feel free to go through each process so that you can process payments by any means your customers chooses.
Expanding Functionality with Extensions
At this point, you now have an online store set up with a product added and you can accept orders and payments from your customers. But to get the most from your store, you should start looking at ways you can expand WooCommerce’s functionality through extensions.
WooCommerce’s extensions function the same way as WordPress plugins. They vastly increase the functionality and flexibility that WooCommerce offers, and you can use them to do things such as:
- Create landing pages for product promotions
- Create dynamic pricing and discounts
- Change the behaviour of your store when a shopping cart is abandoned
- And more
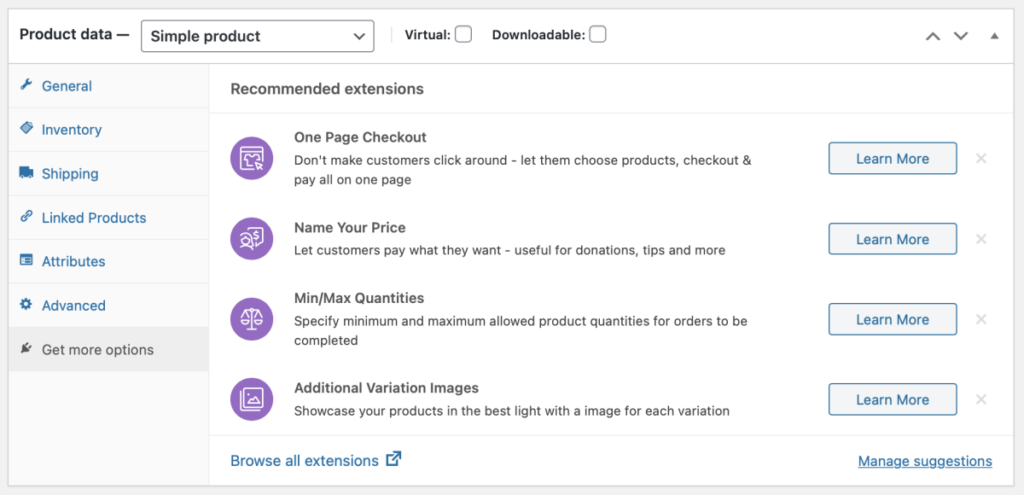
To get a better idea about what kinds of things you can accomplish with extensions, take a look at the Get more options tab on the product data page:
As with WordPress plugins, some extensions are free and others are paid, all of which can be accessed from your WordPress dashboard by clicking on Extensions under the WooCommerce menu.
Before paying for any extensions, it’s a good idea to link your WordPress website to your WooCommerce account. To do so, click on the Subscriptions tab at the top of the Extensions page. Click to connect and authorize your account.

Once you’re ready to start adding extensions, you can do so by browsing or searching from the extensions page and then clicking on the install button for the corresponding extension you’d like to use.

Once you’ve decided on an extension and clicked to install it, you’ll come to a checkout page where you can confirm the purchase. The checkout process is the same whether it’s a free or premium extension. Simply fill in your personal information and then click purchase to install the extension.
One last thing to note is that extensions can also be manually installed the same way you would install a WordPress plugin. This is done from WordPress’s plugin dashboard.
Managing Your Orders
By now, your online store is open, you have products in your inventory, and you can start taking orders. What happens next?
Once people start purchasing your products, it’s important to know how to track and manage your sales and orders. Thankfully, WooCommerce’s built-in functionality helps in managing all of this.
In your WordPress dashboard, under the WooCommerce menu, you may have noticed the Orders link at the top. This is where you’ll view and manage all the orders that come in through your store.
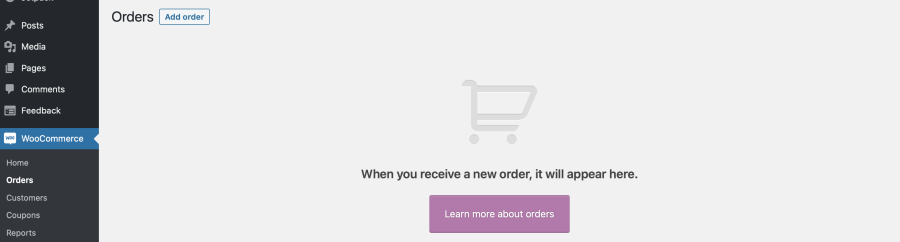
Once orders start coming in, you can use this area to see order status, payment status, changing shipping information, and more. You can also use it to send out emails to customers who have placed orders.
Another great feature for managing your store is WooCommerce’s Reports, located a few links down from Orders in the WooCommerce menu.
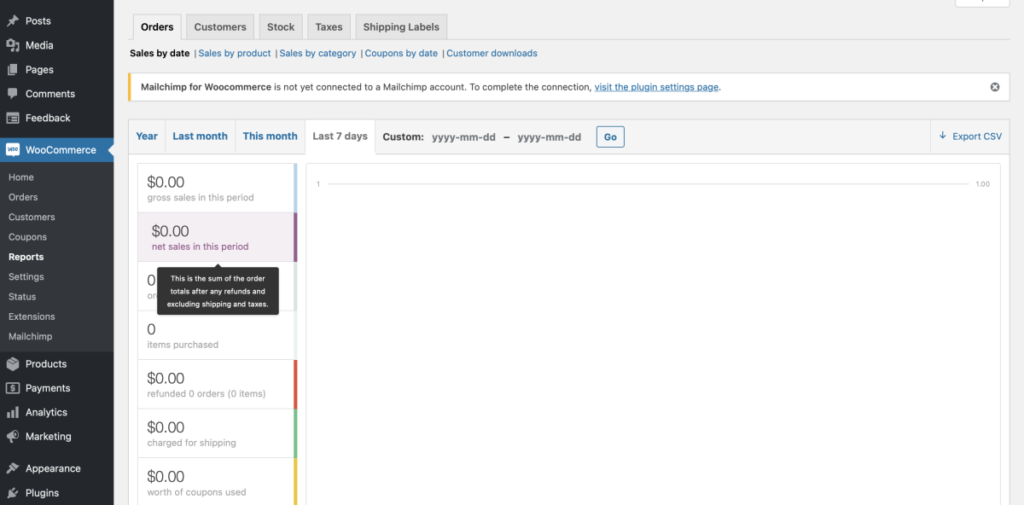
With reports, you can view your orders and sales by a variety of metrics and time periods, as well as see helpful trends based on items purchased, inventory, sales, and so on. This kind of data can give you valuable information for how your store and products are performing so that you can make better business decisions.
This is just a couple of WooCommerce’s built-in features that can make managing your store simply and efficient. And, as mentioned before, to take functionality to the next level, there are hundreds of extensions to choose from to help you make the best store possible.
Final Words – A Beginner’s Guide to WooCommerce
We’ve covered a lot in this guide, and there’s certainly a lot more to cover in the arena of e-commerce, but WooCommerce does a wonderful job of making things simple and accessible. Of course, if you’re serious about e-commerce and you really want to learn all there is to know about WooCommerce and all of its power and versatility, the WooCommerce Docs is a great place to begin.
Moreover, if you find you’ve fallen into the amazing world of e-commerce, it’s important to not forget about all the other technical aspects that go into keeping your WordPress website and online store running smoothly. There’s a lot that goes into running an online shop, so enlisting the help of a trustworthy WordPress management service can free you up to focus on creating new products and marketing your store rather than worrying about security. Not only will you be thanking yourself later, but your customers will be too.
Join Our Newsletter
Stay up to date on the latest WordPress tips and news