Easily Add New Icons to Your WordPress Website
Endless Possibilities With Icon Fonts
Icons are an integral part of any website. They bring your pages to life and help your visitors understand the various sections of your website. Your shopping cart link, download indicators, navigation arrows, and text blurbs would all be pretty lifeless without them.
Given the importance of icons, you’ll probably want to give a little attention to making sure you have some really great ones on your website for usability reasons. And for style, of course. That said, one of the easiest ways to do this is through using an icon font.
The Benefits of Using an Icon Font
An icon font is a collection of vector images in a collection that’s loaded and processed like a font file. There are a number of clear benefits in using an icon font for your website’s iconography as opposed to images.
Options
For starters, you have a plethora of options. Endless, endless options. There are dozens of icon fonts available across the web, and each of these fonts include hundreds of icons. Which means you potentially have thousands of icons to choose from to customize the look and style of your website.
Customization
If the endless options aren’t enough, you can customize icon fonts just as you would regular fonts. Meaning you can easily style them using CSS to match your website’s design. With CSS, you can control the size, color, and positioning. You even add drop shadows and outlines to your icons.
Performance
Because icon fonts are vector files, they’re smaller than typical image files, so your overall website performance is better. On top of that, you can build your own custom icon fonts so that you only load the icons that you need for your website.
Given the benefits, it should come as no surprise that WordPress uses an icon font for its back end. The dashicons font provides all of the icons used in the WordPress dashboard, and you also have access to these icons for your website. But let’s take a look at how we you can add even more icon fonts to your website.
Using Icon Fonts in WordPress
The power of icon fonts is that you can upload them to your web server and use them in your WordPress stylesheets. And there are tons of icon fonts out there to choose from. But there are also services that allow you to choose from a repository of icons and create your own custom font.
One such example of these services is Flaticon.com. Flaticon.com is an amazing repository of millions of vector icons that allows you to easily create your own collection and package it up for use on your WordPress website.
Throughout this guide, we’ll use Flaticon.com to create an icon font, customize it with CSS, upload it to WordPress, and then add it to a page on your website.
Create Your Own Icon Font with Flaticon.com
With Flaticon, you can create a pack of up to 10 icons without registration. If you take the time to register, however, you’re able to create up to three icon collections with a total of 256 icons per collection. And you can also download an entire package of icons, so if you find a pack that suits you, you don’t need to spend time creating your own, one at a time.
To get started, enter a search word or phrase. We’ll use the term “marketing,” as an example. Be sure to set the license type to Free. You’ll also want to filter the style section to Black Outline as these icons are easier to style with CSS.

Once you’ve found an icon that you like, click on it to open a preview window. From here, you can click on the Add to collection button and then click the close button to return to your search results.
![]()
From here, you can continue adding icons to your collection. If you want to speed things up a bit, you can hover over any icon and click the Add to collection button to add it without opening the preview window.
![]()
A quick tip: When you’re adding icons to your collection, try to find icons that have a similar look and feel so that your website looks consistent and cohesive once they’re added. Specific icon packs can be helpful here as they’re created by a single designer and look more uniform together.
Once you have all the icons you want, click the Download Collection button at the top and then select the icon font format.
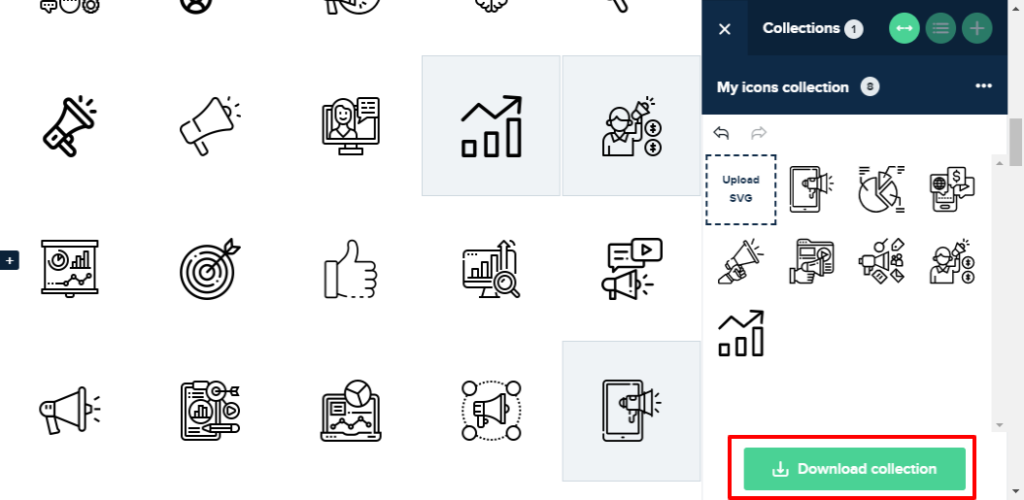
When prompted, make sure to click on the Icon font button to download your collection of icons in the correct format.

You’ll now have a zip file with everything you need to add your new icon font to WordPress. Go ahead and extract the files to a folder on your computer and open it up.
Uploading Your New Icon Font to WordPress
The next step is to upload your new icon font to WordPress. But before we do that, we’re going to style it with a little CSS. Open the flaticons.css in your favourite text or code editor and locate the following line:
[class^="flaticon-"]:before, [class*=" flaticon-"]:before,
[class^="flaticon-"]:after, [class*=" flaticon-"]:after {
This is the CSS class used to style our icons. Change the class properties within the curly braces {} to the following:
font-family: Flaticon;
font-size: 50px;
display: block;
text-align: center;
margin-bottom: 20px;
These are simple styling properties that will make the icons appear bigger and centered.
Now let’s have a look at the individual icon classes:
.flaticon-bar-chart:before { content: "\f100"; }
.flaticon-marketing:before { content: "\f101"; }
.flaticon-seo:before { content: "\f102"; }
.flaticon-digital-marketing:before { content: "\f103"; }
.flaticon-loudspeaker:before { content: "\f104"; }
.flaticon-decision:before { content: "\f105"; }
Each of the above classes represents one of the icons we added to our font collection. We will need to use the names of these classes when adding icons to our website. More on that later.
Once you’re done editing, save the file.
Next, we’ll need to upload the files using an FTP client such as FileZilla or Cyberduck. They’ll need to go in your the css folder in your themes directory, which is usually structured like so:
/public_html/wp-content/themes/your-theme-here/css/
Once the files are uploaded, you’ll need to edit your theme’s functions.php file. If you’re using a template theme, you’ll probably want to use a child theme here. This will ensure your code doesn’t get modified when the developer updates their theme.
To edit your functions.php file, head into your WordPress dashboard and click on Appearance > Theme Editor. Then click on Theme Functions on the right side of the code editor. At the bottom of the file, after all other code blocks, copy and paste the following code into the editor:
function add_custom_font_icon() {
	wp_enqueue_style( 'flaticon', get_template_directory_uri() . '/css/flaticon/font/flaticon.css');
}
add_action( 'wp_enqueue_scripts', 'add_custom_font_icon' );
You’ll want to make sure the path inside the function matches the directory where you uploaded your files. Save the file and get ready to add custom icons to your website!
Using Your New Icons
In this example, we’ll be using the WPBakery builder, but the same principle applies to any page builder plugin. To start, create a new row on the page you want to add your icons to and give it a three column layout.
Remember the names of the icon classes we examined earlier in the flaticons.css file? This is where they are needed.
In each column, add an HTML module and paste code representing a different icon. For example, the code below is for the flaticon-bar-chart icon.
<i class="flaticon-bar-chart"></i>It should look like so:

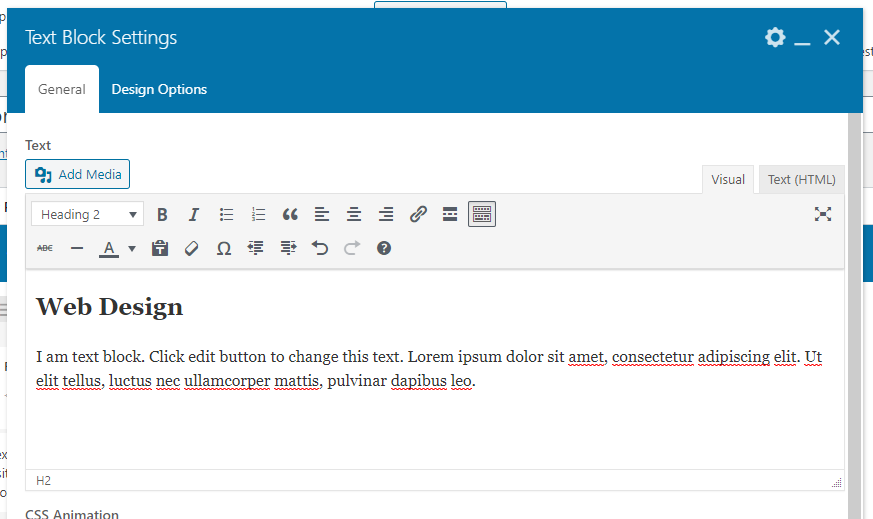
Below each module, add a text block and some text that compliments your icon. This could be a headline along with a list of services or a short description of some kind.
When you’ve finished editing your page, it should look as follows:

Click on the Preview button to check out what you have so far:

Looking pretty nice!
But if we want to take it a step further, we can modify the flaticons.css file to spice things up. Keep in mind that, with CSS, you can easily adjust the colors and size of your icons, among other things.
For example, you might want to an icon in more than one area of your website, such as on the homepage and in the footer. With CSS, you can modify the icon on your homepage to make it bigger and more prominent while having the icon be smaller in your footer. To see exactly how it works, let’s change the colours of our icons to make them pop a little more.
Open up the flaticons.css file and add the following code to it:
.services-1-icon {
    color: #0160e7;
}
.services-2-icon {
    color: #84B556;
}
.services-3-icon {
	color: #fe4c1c;
}
Save the file and then use your FTP application to upload it again. Note that, any time you make changes to your CSS file, you’ll need to re-upload it and overwrite the old file. Next, go back and edit the page where we added the icons. You’ll need to add the CSS classes to the HTML blocks that we created:
<i class="services-1-icon flaticon-bar-chart"></i> Save the page and check it out!

Conclusion: Adding Icon Fonts to WordPress
Now that we’ve gone through the process of adding a custom icon font to WordPress, we’ve opened a new world of possibilities. With Flaticons.com. there are endless options for icons you can use on your website. Just remember to choose icons that are easy to style, look professional, and appear consistent. Following these simple rules, new icons can go a long way in making your WordPress website look fresh and new. Not only that, but improved website performance and a better user experience means your website will potentially perform better in search rankings too.
Join Our Newsletter
Stay up to date on the latest WordPress tips and news